Final Assault Strategy Guide
Final Assault is a virtual reality real time strategy game set during World War II. It has a single player campaign mode as well as multiplayer. There are six divisions you can play, split between American and German forces. Each division has its own set of units it can deploy, so your strategy will have to change depending on which units your opponent has available.
It is a bit like playing a game with miniatures. You control the units by dragging a path for them to follow. You can set a unit on a looping path to patrol an area, or have it sit in one spot and defend. It works really well once you get used to it.
Unfortunately, the tutorial only teaches you the very basics of how to play the game. It took me quite a while to figure out what all the units do and how best to use them. In this strategy guide, I will talk about the overall strategy for the game and then talk about each unit and how they are best used.
Overall Strategy
Final Assault forgoes any base building or resource gathering, instead focusing on combat. Your base automatically deploys infantry troops that march along predefined lanes in each map. You deploy and control all the vehicles.
The only resource you have to consider is money. Your money constantly replenishes, but you have to decide whether it is worth waiting to gain enough to deploy your most powerful units or if it is better to immediately deploy several cheaper, but weaker, units.
The maximum cash you can have on hand is $30 and an alarm will sound when you reach the max to remind you to spend the money you have so you can get more. Ideally, you never want to hear the alarm. You always want to be building up your forces.
Units are divided into four tiers. Tiers 1 and 2 are available from the start of a match, but Tier 3 and Tier 4 need to be unlocked, in order, by spending $25 and $28, respectively. Since your maximum is $30, unlocking these tiers will deplete nearly all of your money, making you wait to deploy units until your cash rebuilds.
Each map has three marked spots where war chests will occasionally be dropped. Each war chest is worth a lot of money (between $10 and $25), which is extremely useful for unlocking the higher tier units early in the game. Make sure to spend money before picking up the chest, or else the excess is wasted.
It is very important to control the drop points early in the game. Not only do you gain much needed cash to unlock higher tier units, but you prevent your enemy from doing the same. If you can be the first to deploy Tier 4 units, you will have a much easier time maintaining control of the map.
Now let's discuss each unit in the game and how they are best used.
American Forces
There are three divisions of American forces, each with their own strengths and weaknesses.
Beaumont is the Tank division, having very powerful armored tanks available, but very weak infantry and air support. This is a very good starting division, as the units are fairly durable, giving you time to move them if they get attacked. Many of these units can be set to patrol areas and require little micro-managing.
Nickles is the Air division, having the most powerful air units available. Air units require a lot of micro-managing to be effective, so this can be a very difficult division to play when starting out.
Simmons is the Infantry division, having the most infantry units available. You don't directly control infantry units, so this division requires the least micro-managing of all. Your main job is to protect your infantry units from the enemy.
Tier 1 / Tier 2
Tier 1 and Tier 2 units are available from the start of a game. Depending on the division you are playing, they will cost different amounts. Beaumont will have the cheapest tanks, for instance.
At this stage of the game, the divisions play quite similarly, since they share the same units. At Tier 3 and 4, they diverge quite heavily.
| Health | 3 |
| Speed | 3 |
| Damage | 3 |
| Range | 1 |
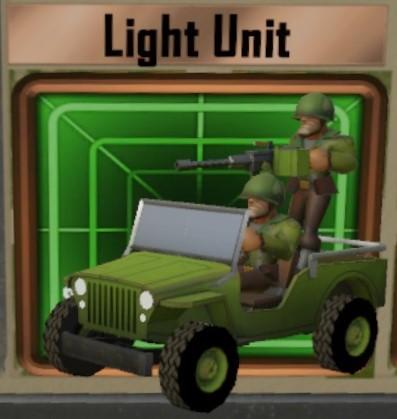
Jeep (Beaumont, Nickles, Simmons)
The fastest ground unit on the American side, the Jeep is great for grabbing war chest drops. The German Motorcycle is faster still, though, so you will need to have these on standby if you want have to race for it. It is the cheapest unit you have, so it is a good one to have sitting on the drop point, while more powerful units can be used to prevent the enemy from getting to the drop point.
The Jeep is more useful than that, however. It can fire in all directions, so you can have it patrol an area and it can deliver quite a bit of damage. It is perfect for taking down enemy artillery units. If you keep it moving, slow firing units will have a hard time hitting it. It is easily destroyed by enemy tanks, though, so don't even bother sending it near a heavily defended area.
If the enemy has placed artillery units unguarded, the Jeep is perfect for destroying them. Its speed makes it nearly impossible for the artillery to hit it, and it does enough damage to destroy one in just a few seconds. Since it can fire in all directions, just have your Jeep circle the Artillery and it won't be touched.
| Health | 4 |
| Speed | 1 |
| Damage | 2 |
| Range | 2 |
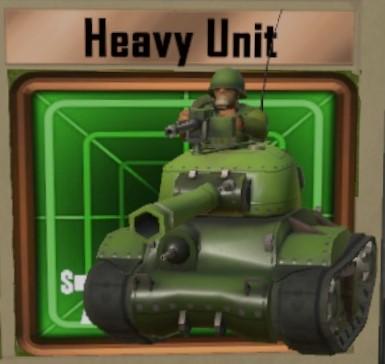
Tank (Beaumont, Nickles, Simmons)
The tank is probably the most overall useful unit. It is pretty cheap to build and is very strong. They are vulnerable to Artillery units if they sit still. Luckily it can attack while moving, so make sure to set them up on patrols to keep them safe.
Tanks work very well as guards for weaker units. A lone Artillery unit is easily destroyed by the enemy, but an Artillery unit guarded by two tanks takes significant resources. A couple of Artillery units guarded by several tanks is a very strong defensive line in the early game.
Keep in mind that tanks work best deployed in groups, especially if you are trying to get through an enemy chokepoint. If you send them in one at a time, the enemy units will focus fire and easily destroy them. Sending in a group of three or four, however, will disperse all the enemy attacks, letting them do much more damage as a group.
This is the best way to take out guarded enemy Artillery units. You'll need to distract the other units so one of your tanks can get close enough to take out the enemy Artillery.
| Health | 1 |
| Speed | 3 |
| Damage | 1 |
| Spawns | Infantry Troops |
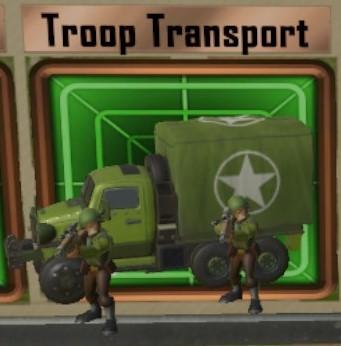
Infantry Truck (Beaumont, Nickles, Simmons)
The Infantry Truck simply spawns Infantry units. You will need far more Infantry than will come from your base. Infantry troops don't do a lot of damage, but they are very good at slowing down enemy advances on the lanes, giving your Artillery easy targets.
Be aware that the Infantry Truck has no defenses and is easily destroyed, so you have to be careful where you deploy them. Early in a round it is best to create these within the safety of your base. As you expand your area, and especially as your enemy unlocks their Tier 4 units, you can disperse them. If you keep them all packed together, they become an easy target for a Base Ability or Bomber. If you spread them out, you can keep the enemy from having an easy attack.
| Health | 3 |
| Speed | 5 |
| Damage | 2 |
| Range | 1 |
| Attack Type | Strafe |
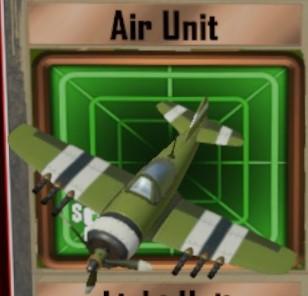
Fighter (Beaumont, Nickles, Simmons)
The Fighter is good at defending the skies and attacking enemy Infantry units. Its attacks won't damage armored units very much. Fighters will automatically attack air units that come into range, but you have to manually create a path to attack ground units. As you drag a path for them, it will turn red where they will actually attack. The best use for this is to create a strafing run along the lanes to kill all the oncoming infantry.
All air units require close monitoring. They are very weak against other aircraft and Anti-Air units. If you have one plane on a strafing loop, you will need to have several other planes flying to protect each other. If you don't need the planes, have them fly back to your base until you need them again.
Be very careful to not let them get close to the enemy base. The base Anti-Air defense will immediately destroy them. An easy tactic is to lure an enemy aircraft towards your base or towards an Anti-Air unit. If the enemy isn't paying attention, their plane will follow directly into the path of the Anti-Air defense and be destroyed.
Likewise, you have to make sure your planes don't get lured toward the enemy base or enemy Anti-Air units.
| Health | 1 |
| Speed | 2 |
| Damage | 2 |
| Range | 4 |
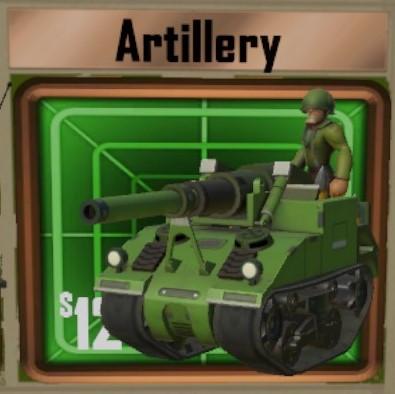
Artillery (Beaumont, Nickles, Simmons)
The Artillery unit is your long range attack unit. Unlike most units, it does not require line-of-sight to the target and has no problem hitting targets that are on higher or lower elevations. The cost for this versatility is that it is a stationary unit and is extremely vulnerable, so you need to place these strategically to keep them away from enemy units.
These are fantastic at controlling the lanes. They easily kill entire groups of infantry units. Their attack has a small area of effect, so they are strong against any slow moving tanks as well. Faster moving units, however, can bypass them completely without taking much damage at all. You need to create a chokepoint with either a lot of infantry or a few armored tanks to slow down the enemy forces, making them very easy targets for the Artillery to attack.
Given their long range, it is tempting to try to use Artillery to take out the enemy's Artillery. This won't work, however. In the time it takes for the unit to set up and fire, it will already be destroyed by the enemy Artillery.
Position these behind the cover of buildings or walls and use elevation to your advantage to prevent tanks and other line-of-sight units from being able to attack it easily. Always have some tanks nearby to cut off any direct attacks as well. A German Motorcycle unit can easily destroy an unprotected Artillery if it can get within range.
| Health | 1 |
| Speed | 3 |
| Damage | 1 |
| Spawns | Bazooka Infantry |
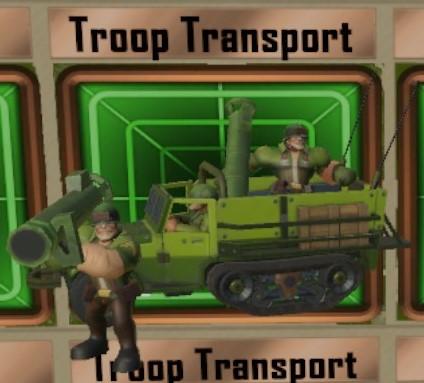
Bazooka Troop Truck (Simmons)
This is just like the normal Infantry Truck except it spawns the much more powerful Bazooka Troops. These guys move very slowly, but are excellent at attacking armored units. As they march forward, they will attack anything they can see, including units that are not in the lane. They have very little defense, only slightly better than the normal infantry, so they need protection from air and Artillery attacks.
If you focus a couple of these trucks on one lane, they can become a devestating force, as long as you protect them from the air. Given how slow they move, having the trucks positioned closer to the front line can make a big difference in their effectiveness. You just have to be really careful that the truck remains protected.
| Health | 4 |
| Speed | 1 |
| Damage | 4 |
| Range | 1 |
Flame Tank (Beaumont)
The flame tank is a very slow moving, but heavily armored flame thrower. While it does a lot of damage, it needs to be very close to attack and it is so slow that it is vulnerable to Artillery attacks.
It can attack while moving, so the best use is to have it move along the side of a lane to clear out enemy infantry.
| Health | 2 |
| Speed | 4 |
| Damage | 1 |
| Range | 1 |
| Spawns | Paratroopers |
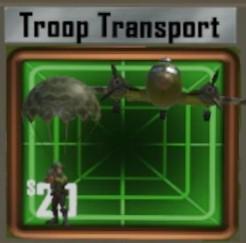
Troop Plane (Nickles)
The Troop Plane spawns infantry units just like an Infantry Truck, though it spawns four infantry at a time. It is extremely vulnerable to enemy attacks, so the only safe place to use this is at your base. Set it on a patrol that hovers behind your base and drops troops right in your base.
It will only drop troops if you see the large green circle on the ground, which is easiest to do by setting up a strafing run as you would other air units. Keep the path far behind your base and enemy fighters will be destroyed by your base's Anti-Air defense well before they can hit the Troop Plane.
Tier 3
Tier 3 units are significantly more powerful, and more costly. These units really mark the strong differences between the divisions.
You have to unlock the Tier 3 units by building up and spending $25. This leaves you unable to deploy any units for quite a long time, so you have to wait until you have a solid defense before unlocking Tier 3.
Making sure you have control of the war chest drop points early in the game can let you unlock Tier 3 units well before your enemy, giving you a big advantage.
| Health | 1 |
| Speed | 2 |
| Damage | 3 |
| Range | 2 |
| Attack Type | Only Air Units |
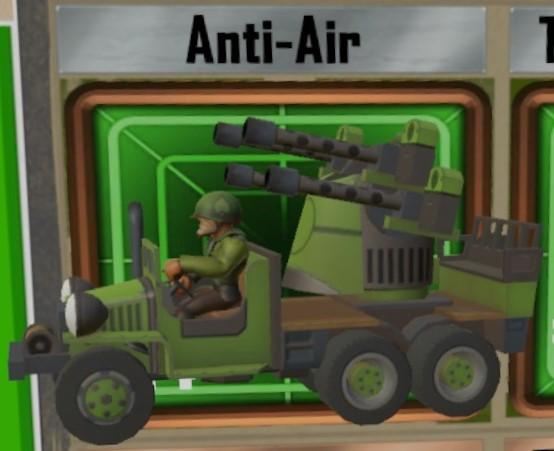
Anti-Air (Beaumont, Nickles, Simmons)
The Anti-Air unit is critical for controlling the skies. If you let the enemy launch several fighters, they can destroy your infantry in seconds. Having even a single Anti-Air unit patrolling around the battlefield greatly limits the enemy Air units effectiveness. It also makes the enemy have to send some units specifically to destroy the Anti-Air unit, leaving the lanes less defended.
The Anti-Air unit is extremely vulnerable to ground fire, so make sure it is protected by some tanks. You will also want to keep it moving, as it needs to be pretty close to the planes to hit them. If you are going up against an Air division, you will need several Anti-Air units patrolling all over the map to keep things even.
| Health | 3 |
| Speed | 0 |
| Damage | 3 |
| Range | 3 |
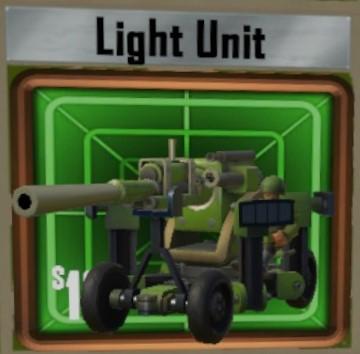
Anti-Tank Gun (Simmons)
The Anti-Tank gun has a very long range and is very powerful, though it requires line-of-sight. When you deploy it, a Jeep drives the gun onto the battlefield. Once deployed, the Anti-Tank Gun is a nearly stationary unit. While it can move, it is incredibly slow. You are free to use the Jeep however you like, it is not connected to the Anti-Tank Gun any longer.
It works very well positioned at the end of a lane. It will have easy line-of-sight and it's long range can stop enemy units from getting close. A clever enemy will take their units on a path that blocks the line-of-sight as much as possible. Having two or three of these strategically placed can cover all the angles and make life very difficult for the enemy.
On maps that have a lot of wide open areas, this is a very powerful unit. On maps with a lot of twists and turns, you may find that the Anti-Tank Gun just can't attack well.
| Health | 1 |
| Speed | 3 |
| Damage | 1 |
| Spawns | Mortar Infantry |
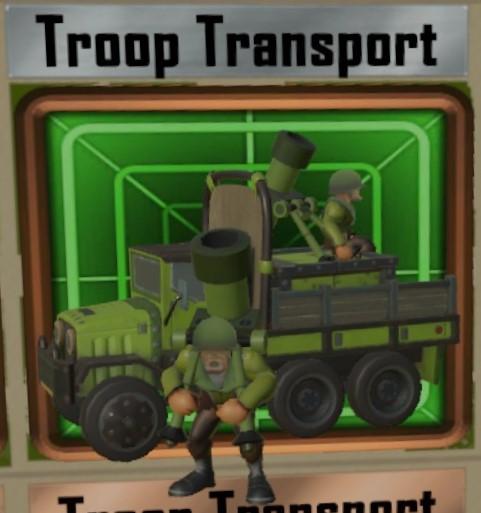
Mortar Truck (Beaumont)
This is just like the normal Infantry Truck except it spawns the much more powerful Mortar Troops. Mortar Troops behave much like the Bazooka Troops, but they have a longer range attack that doesn't need line-of-sight. These guys move very slowly, but are excellent at attacking armored units. As they march forward, they will attack anything within range. They have very little defense, only slightly better than the normal infantry, so they need protection from air and Artillery attacks.
A combination of Mortar and Bazooka troops, in high enough numbers, can open up a lane completely, as long as you protect them from Air attacks. Much like the Bazooka Troops, given how slow they move, having the trucks positioned closer to the front line can make a big difference in their effectiveness. You just have to be really careful that the truck remains protected.
| Health | 3 |
| Speed | 5 |
| Damage | 3 |
| Range | 1 |
| Attack Type | Strafe |
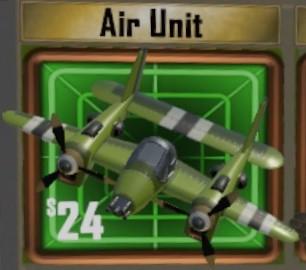
Heavy Fighter (Nickles)
The Heavy Fighter behaves just like the normal Fighter, but only damages armored units. Like the Fighter, you have to set up a strafing run, but it is more finicky. You need to set a very direct path or it won't fire. This takes a bit of practice to learn how much room it needs to line up a shot.
It is still easily destroyed by enemy aircraft and Anti-Air units, so you want to have these circling over your base until they are needed and you have good control of the air space.
Tier 4
Tier 4 has the most powerful units in the game. Each division has a unique Tier 4 unit, as well as the common Base Ability.
You have to build up and spend all your money to unlock Tier 4, after unlocking Tier 3. Unless your enemy is playing extremely poorly, you will need the war chest drops to unlock Tier 4 in a timely manner.
Using these well can dramatically shift the tide of battle. Wasting them, however, can give your opponent a great opportunity to strike.
| Health | 4 |
| Speed | 1 |
| Damage | 2 |
| Range | 4 |
Artillery Rockets (Beaumont)
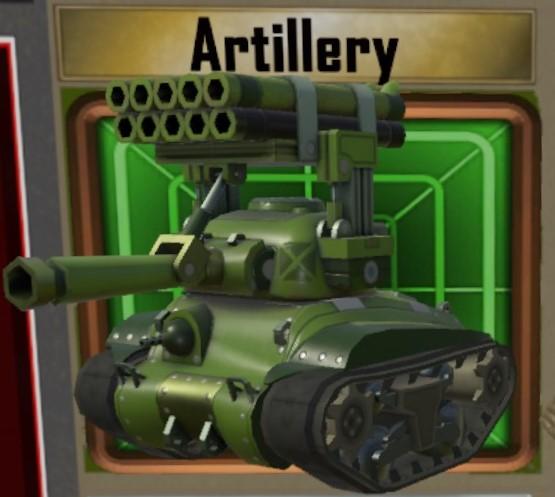
The Artillery Rockets is one of the best units in the game. It fires several rockets at a time to multiple targets. It doesn't require line-of-sight, has a very long range and can attack while moving. This can easily turn the tide of battle.
Keep it moving to protect it from Artillery attacks. If the enemy has a chokepoint set up making it impossible to get through a lane, one or two of these will easily demolish the whole area.
You want to unlock this unit as fast as possible. It's wise to play defensively at the beginning of a game, focusing on collecting war chests and not wasting money as much as possible. Once you get this on the map, you can easily push through the enemy defenses.
| Health | 1 |
| Speed | 3 |
| Damage | 1 |
| Attack Type | Both Ground and Air Units |
Anti-Air Tank (Nickles)
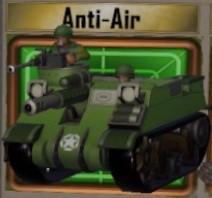
The Anti-Air tank is able to attack both ground and air units, making it a very flexible unit. It doesn't have a lot of health, so you do need to be careful with its placement, but since it can attack ground units, it isn't nearly as fragile as the normal Anti-Air unit.
This can be a very strong unit when your enemy is focusing on air superiority. It can clear out ground units like a normal tank and prevent any help from the skies.
| Health | 4 |
| Speed | 4 |
| Damage | 4 |
| Range | 1 |
| Attack Type | Strafe |
Heavy Bomber (Simmons)
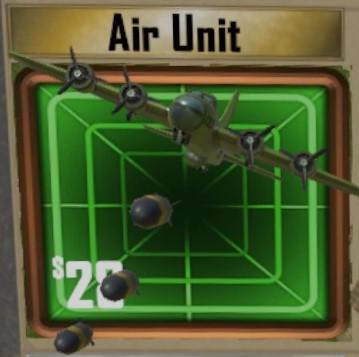
The Heavy Bomber is a very damaging unit, but slow moving compared to other aircraft, making it an easy target. It will drop a line of bombs over the strafing run you set and it can destroy several units at a time if you line it up right.
Expect the enemy to launch several planes as soon as you bring out the Heavy Bomber, so be careful to bring it back to safety after a bombing run. You will want to have complete control over the skies, with some Anti-Air units deployed to protect it from enemy fighters.
Unfortunately, it cannot attack close to the enemy base, because the base's air defense will destroy it. Given that it's a Tier 4 unit, you may find that if you already have pretty good control of the map, your money is better spent sending a wave of Tanks and Artillery to keep the enemy locked close to their base.
| Damage | 5 |
| Range | 5 |
Base Ability - Artillery Barrage (Beaumont, Nickles, Simmons)
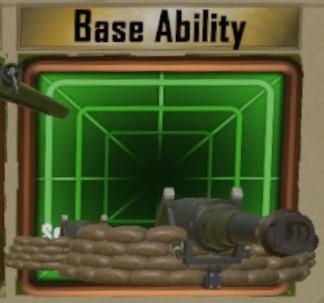
The American Base Ability launches a giant artillery barrage to any point on the map. It has a very large area of effect that will do a lot of damage to anything in the area. This is particularly powerful against an enemy that has a large amount of units hiding in the safety of their base.
There is a warning to the enemy when this fires, so if they are quick, they will try to reposition their most valuable units to escape the damage zone. Try to position the blast zone in such a way that the most valuable units won't be able to escape.
Trying to attack a moving unit is very difficult with this and will likely end up with you just wasting a lot of money. It is better to just send several tanks out to try to stop it.
German Forces
There are three divisions of the German forces, each similar to its American counterpart.
Galland is the Infantry division. Like its American counterpart, you don't directly control the infantry units, so your job is to protect them from enemy units. This requires the least amount of micro-managing and is a very beginner-friendly division.
Von Ritter is the Air division. The Air units require, by far, the most micro-managing to be effective, so it is best to start with the other divisions first to learn the maps.
Wulf is the Tank division. The infantry and air is bare-bones, but it has access to the most armored units in the game, which don't require a lot of micro-managing. It is also a good starting division. Since the units can take a few units before dying, you can make some positioning mistakes without disastrous consequences.
Tier 1 / Tier 2
Tier 1 and Tier 2 units are available from the start of a game. Depending on the division you are playing, they will cost different amounts. Wulf will have the cheapest tanks, for instance.
At this stage of the game, the divisions play quite similarly, since they share the same units. At Tier 3 and 4, they diverge quite heavily.
| Health | 1 |
| Speed | 4 |
| Damage | 2 |
| Range | 1 |
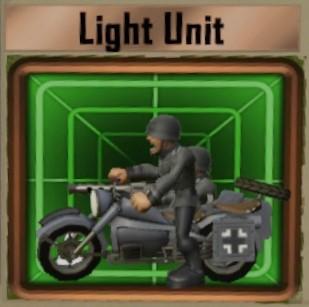
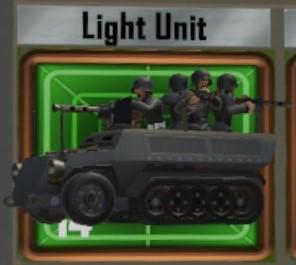
Motorcycle (Galland, Von Ritter, Wulf)
The German Motorcycle is the fastest ground unit in the game, but is otherwise very weak. It is great for quickly getting to war chest drops, but it won't survive a fight, even against an American Jeep, so don't position them at heavily contested areas.
It is tempting to use these as you would the American Jeep, but besides the stat difference, the behave differently. Most notably, they can only fire in the direction they are facing, so they don't work very well on a patrol the way a Jeep does, as much of the time they will be taking damage without being able to fire back.
They can still be used to take out unguarded enemy Artillery units, but you will likely loose the Motorcycle in the process.
| Health | 4 |
| Speed | 1 |
| Damage | 2 |
| Range | 2 |
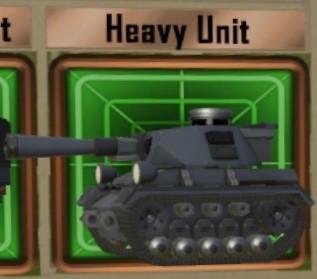
Tank (Galland, Von Ritter, Wulf)
The German Tank is identical to the American version, so all of the same rules apply. They are best deployed in groups and keep them on a patrol to keep them safe from Artillery and Bombers.
Since the German Motorcycle is considerably weaker than the American Jeep, you will often have to deploy Tanks in a situation where you could use a Jeep as an American. Especially for taking out enemy Artillery units, often a Motorcycle won't even be able to get past enemy Infantry units, whereas the Tank can easily drive right by, keeping a heading towards the Artillery.
| Health | 1 |
| Speed | 3 |
| Damage | 2 |
| Range | 2 |
| Spawns | Infantry Troops |
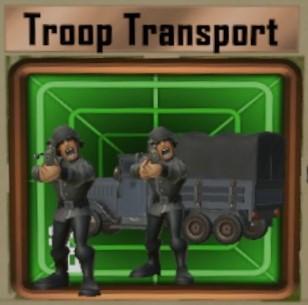
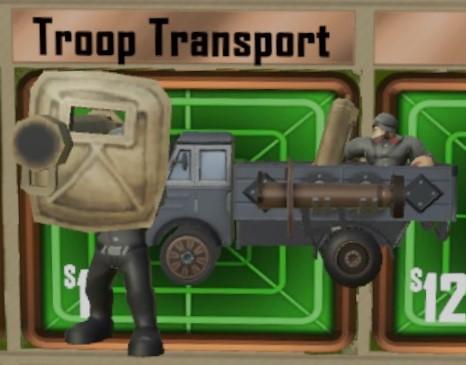
Infantry Truck (Galland, Von Ritter, Wulf)
The Infantry Truck behaves just like its American counterpart, simply spawning Infantry troops. It has essentially no defenses and is easily destroyed, so only set them up in well protected or out of the way areas.
Early in a round, keep them within the safety of your base, but as the round progresses, you can disperse them to areas where you have control. The American Base Ability can cover the entire area of your base, making it particularly devestating if you keep them all stored in your base. By spreading them out, you can keep the enemy from doing too much damage at once.
| Health | 3 |
| Speed | 5 |
| Damage | 3 |
| Range | 1 |
| Attack Type | Strafe |
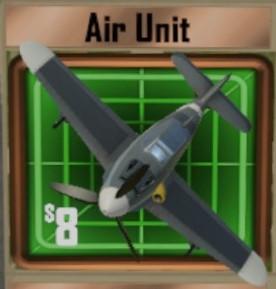
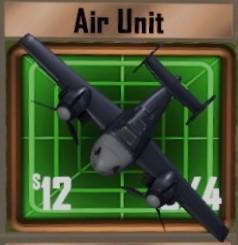
Fighter (Galland, Von Ritter, Wulf)
The Fighter is similar to the American Fighter and all the same rules apply, but is a little bit more powerful, letting you have easier control of the sky. It is very strong against Air units and Infantry, but doesn't do much against armored ground units.
All air units require micro-managing to keep them safe and maximize their power. Keep up their strafing runs to take out enemy infantry, moving them forward as necessary. Have several planes out to provide defense for the others.
| Health | 1 |
| Speed | 2 |
| Damage | 2 |
| Range | 4 |
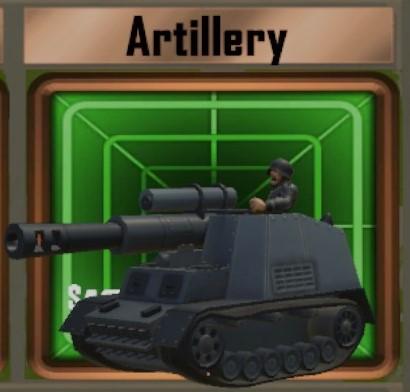
Artillery (Galland, Von Ritter, Wulf)
The German Artillery is, again, identical to its American counterpart. While it has a very long range and is very powerful, it is a stationary unit and is extremely vulnerable, so you need to place these strategically away from enemy units.
As a German, you have to keep a careful eye out for American Jeeps, as they can move fast and easily take out an Artillery unit. If you see a Jeep coming, you will want to have every other unit you have focus fire on it before it can reach the Artillery.
Having several Tanks in the area is necessary to keep them safe.
| Health | 1 |
| Speed | 3 |
| Damage | 2 |
| Range | 2 |
| Spawns | Bazooka Infantry |
Bazooka Truck (Galland)
The Bazooka Truck spawns Bazooka Troops, just like its American counterpart. These guys move very slowly, but are excellent at attacking armored units. As they march forward, they will attack anything they can see, including units that are not in the lane. They have very little defense, only slightly better than the normal infantry, so they need protection from air and Artillery attacks.
Unlike the Americans, you won't be able to support these with Mortar Infantry, so you will be relient on your other air and ground units to protect these troops as they get closer to the front lines.
| Health | 4 |
| Speed | 3 |
| Damage | 3 |
| Range | 2 |
Machine Gun Truck (Von Ritter)
The Machine Gun Truck moves fast, can take quite a lot of damage, and, uniquely, fires in all directions simultaneously. This makes it well suited to attacking densely packed areas. It does tremendous damage against Infantry units and weaker units like Artillery.
If you place it on a patrol path along a lane, it can really slow down the enemy forces, letting you push more units forward. With its high health, you can even send it directly into an enemy area to take down Artillery units. It should be able to withstand the Tanks long enough to destroy its target and in the process deal a lot of damage to the surrounding units as well.
| Health | 3 |
| Speed | 5 |
| Damage | 3 |
| Range | 1 |
| Attack Type | Strafe |
Medium Fighter (Wulf)
The Medium Fighter functions very much like the standard Fighter, still requiring a strafing path to attack, but it fires a short burst of gunfire in a smaller area than the Fighter's longer attack.
This takes some practice to learn where the attack is going to hit. It is not very effective at taking out infantry, instead, it is most effective on armored targets when the burst hits a single unit. Like all air units, this requires a high degree of micro-managing and protection from either Anti-Air units on the ground or other planes in the sky.
Tier 3
Tier 3 units are significantly more powerful, and more costly. These units really mark the strong differences between the divisions.
You have to unlock the Tier 3 units by building up and spending $25. This leaves you unable to deploy any units for quite a long time, so you have to wait until you have a solid defense before unlocking Tier 3.
Making sure you have control of the war chest drop points early in the game can let you unlock Tier 3 units well before your enemy, giving you a big advantage.
| Health | 1 |
| Speed | 2 |
| Damage | 3 |
| Range | 2 |
| Attack Type | Only Air Units |
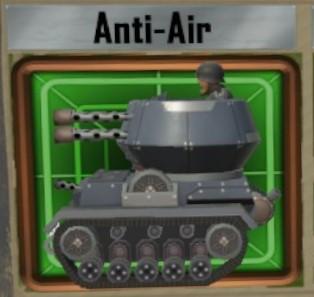
Anti-Air (Galland, Von Ritter, Wulf)
The Anti-Air unit is also identical to its American counterpart. It is critical for controlling the skies, but is very easy to destroy on the ground. You will want to have several of these deployed, patroling around the map if either you or your enemy is an Air division.
You will need a few tanks positioned to protect the Anti-Air units, especially the long range Artillery attacks.
| Health | 2 |
| Speed | 5 |
| Damage | 2 |
| Range | 1 |
| Attack Type | Direct |
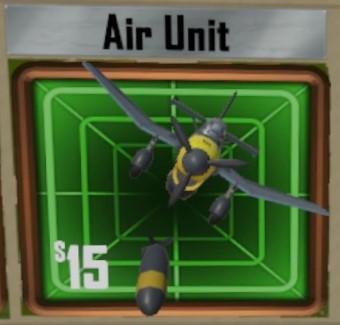
Dive Bomber (Galland)
The Dive Bomber is unique to the German forces. It can do a lot of damage to a single target, but it is difficult to use effectively. You don't create a strafing pattern with this unit, you simply drag it onto a target, making it easy to deploy. It will keep bombing that target until it is destroyed.
Unfortunately, it takes a long time for it to attack. In this time it can easily be destroyed by a single enemy fighter. You need to have complete control of the skies for this to be an effective unit. Have Anti-Air units positioned nearby as well as Fighters that can intercept any incoming planes.
These can be especially good at taking out well defended Artillery units.
| Health | 3 |
| Speed | 5 |
| Damage | 2 |
| Range | 3 |
| Attack Type | Direct |
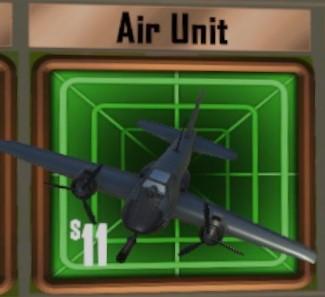
Heavy Fighter (Von Ritter)
The Heavy Fighter is unique to the German side and is very good at taking out enemy armored units. It doesn't use the strafing method to attack, instead it directly targets a unit and will automatically keep attacking it until it is destroyed. Paired with a few Fighters and Anti-Air units, these Heavy Fighters can devestate enemy forces.
This unit alone makes playing as Von Ritter significantly easier than Nickles on the American side. It doesn't require nearly as much micro-managing and is available from the start of a match.
Expect your opponent to deploy a lot of Anti-Air units as they become available, so have sufficient Artillery and Tanks deployed to destroy them as soon as possible.
| Health | 4 |
| Speed | 2 |
| Damage | 3 |
| Range | 2 |
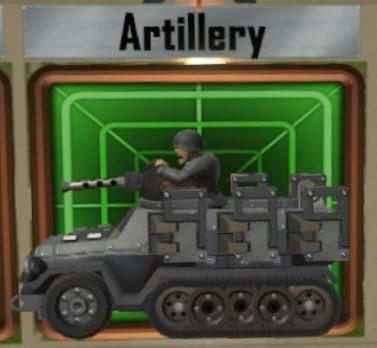
Artillery Rockets (Wulf)
This is a variation of the American Artillery Rockets unit. It fires a continuous sequence of artillery . The German version moves faster, does more damage, but has less range. It doesn't require line-of-sight and can attack while moving. Even if its range isn't as long, it is still a very powerful unit that can easily turn the tide of a battle.
You always want to keep it moving. This way it can attack a wider area and will be much less vulnerable to Artillery units and Bombers.
Being a Tier 3 unit, you can unlock this much earlier than the American version and it should be your main priority to do so. If you can get this out early, it can help all your other units push forward, putting your opponent on defense.
Tier 4
Tier 4 has the most powerful units in the game. Each division has a unique Tier 4 unit, as well as the common Base Ability.
You have to build up and spend all your money to unlock Tier 4, after unlocking Tier 3. Unless your enemy is playing extremely poorly, you will need the war chest drops to unlock Tier 4 in a timely manner.
Using these well can dramatically shift the tide of battle. Wasting them, however, can give your opponent a great opportunity to strike.
| Health | 4 |
| Speed | 1 |
| Damage | 2 |
| Range | 2 |
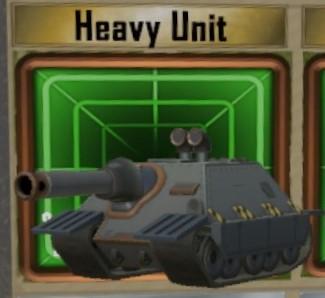
Tank Destroyer (Galland)
The Tank Destroyer is similar in function to the American Anti-Tank Gun, but it isn't fixed in place. It has a long range and needs a direct line of sight to fire. They can't rotate their cannon like a tank, so they actually have to move to retarget.
If your enemy has a well protected position, one of these can pick off the units from a safe distance. Having one at the end of a lane can keep the enemy from being able to get close very easily. Since it can move, it is very hard for the enemy to find hiding spots, especially if you have two of them positioned to cover all sides of an area.
Be aware that its slow speed does make it vulnerable to air attacks from Bombers and you can expect your enemy to focus its attacks to destroy this unit. Make sure to have your Anti-Air units and Fighters positioned to intercept incoming planes.
| Health | 3 |
| Speed | 4 |
| Damage | 4 |
| Range | 1 |
| Attack Type | Strafe |
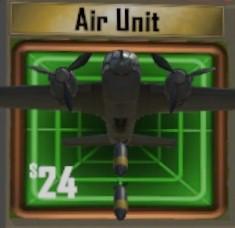
Bomber (Von Ritter)
The Bomber is very similar to the American Heavy Bomber, only having a little less health. It will drop a line of bombs over the strafing run you set and it can destroy several units at a time if you line it up right. It is an easy target given its slower speed, so make sure to have good air defenses ready before deploying it.
If you can keep control over the skies, a single Bomber can destroy enemy chokepoints very easily. It can also serve as a tremendous distraction to the enemy as they will be forced to deal exclusively with the Bomber's actions until it is destroyed. During this time you can maneuver units around to set up an attack that may go unnoticed until it is too late.
When the enemy does launch fighters, make sure to pull the Bomber back to the base, hopefully flying over your Anti-Air units, which should easily destroy the enemy Fighters before they can do much damage.
| Health | 4 |
| Speed | 1 |
| Damage | 2 |
| Range | 2 |
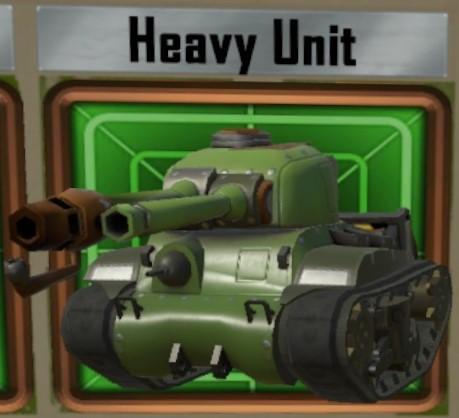
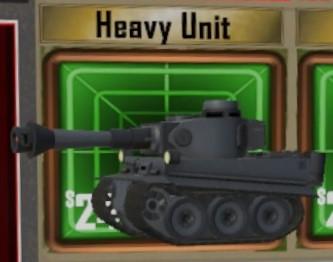
Heavy Tank (Wulf)
The Heavy Tank moves slow and is fairly powerful, but its main ability is how much damage it absorbs. As your enemy is focusing all its attacks on the Heavy Tank, you can have support units move in relatively unscathed and do a ton of damage.
The main problem with these is that it takes them a very long time to rotate the cannon to a new target. Make sure these units don't get surrounded, as it just takes too long for them to aim to be effective.
One of the better uses for these is as a blockade on a lane. With the enemy coming from a single direction, the Heavy Tank barely has to move the cannon and can easily destroy weaker units as they get close.
| Damage | 5 |
| Range | 5 |
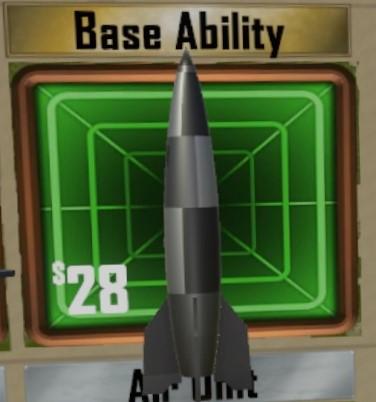
Base Ability - V2 Rocket (Galland, Von Ritter, Wulf)
The German Base Ability launches a V2 rocket to any point on the map. It will destroy pretty much anything in its area of effect. It has a smaller radius than the American Base Ability, but it concentrates the damage, so it's more useful for taking out heavily armored units or towers.
Like the American version, there is a warning to the enemy when this fires, so if they are quick, they will try to reposition their most valuable units to escape the damage zone. Trying to hit a moving target is going to be very difficult with the smaller radius compared to the Americans.
Conclusion
Final Assault is a very fun game, especially once you know what all the units do. Since the game doesn't do a good job teaching these mechanics, I hope this guide has helped you get up to speed.
Let me know if you have any questions or comments.
